Mac OS Virtualization
How to virtualize a Mac OS with Proxmox
VIRTUALIZATION
4/3/20243 min read
One of thing that I like in Proxmox is your versatility. In a connectivity project, I needed to test a Mac OS compatibility with ZTNA client from Fortinet. To turn more interesting I needed more than the current version, Mac OS 14.5 Sonoma but the two previous versions, Mac OS Ventura and Monterey.
In a search I found that the Proxmox has the possibility to run a virtual machines Intel or AMD with Mac OS.
In the https://github.com/luchina-gabriel/OSX-PROXMOX we have the step-by-step procedure to enable in Proxmox Shell that resource.
Keep in mind that in my use case I needed only the test behavior with a Fortinet ZTNA Client in OSX. I don't need the Apple ecosystem integrations like airdrop, Bluetooth and others. To do these integrations work as well you will need more time, patience and research.
I'm using the release 8.2.2 of Proxmox. The previous versions like 7.X.X are also compatible.
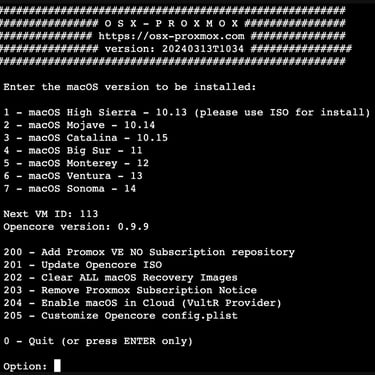
After the instalation of MAC OS module in Proxmox, as a step by step in the link above, and reboot the machine, the OSX options will be accessible on Proxmox shell typing osx-setup. Will be displayed a interactive menu with all the last 7 Mac OS Versions, from High Sierra to Sonoma.
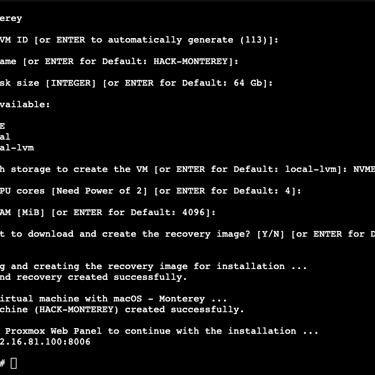
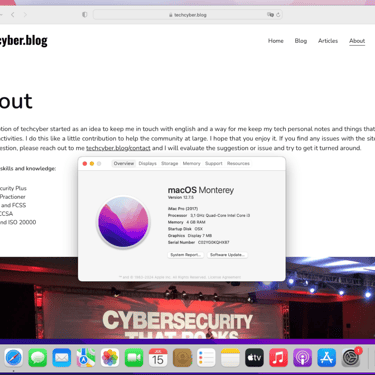
After choose your pretended version, in my example I chose number 5, Montrey, the next step will be defined the VM ID, the next sequence ID available is shown with a ID number, you can define a specific number as your preference or allow the installation choose automatically the available ID pressing ENTER
The next step is choosing the VM name or allow the system to define automatically, pressing ENTER. In sequence fallowing the same mode we will have hardware definitions like VM Disk space, the default suggested is 64GB, enough for most cases, after definition of space disk, the installation will ask if available more than one option, what storage to use. In my case I have one unit SSD and other unit NVME. The default if none not be chosen will be local-lvm. I choose for better VM working a NVME unit.
The last two options are CPU core number and value for RAM memory. The default values are 4 cores and 4096MB of RAM respectively, booth enough for most use cases.
After chose the installation asks if you want to download and create the recovery image, the default will be yes.
After waiting a couple of minutes, the time will depend on your internet connection, the machine template created will be available to power on and start the OSX installation.
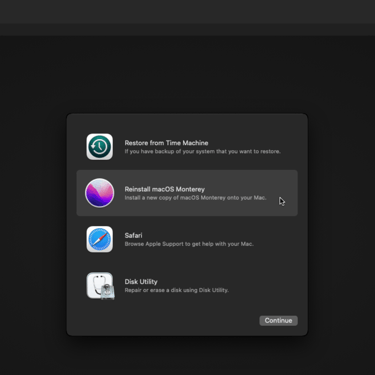
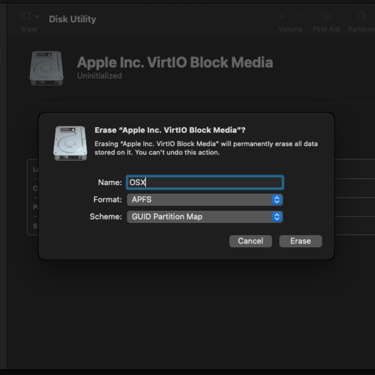
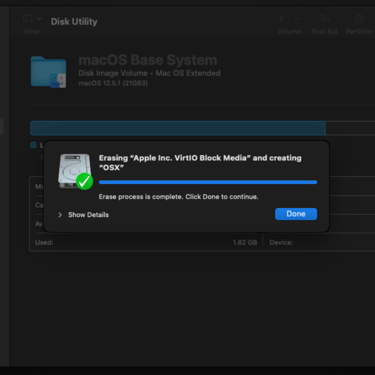
After power on the VM on the console we need to select the option to start the OSX to install, the option number 1. After that, the installation process will begin. It will be necessary to prepare the disk unit to receive the OSX. So, go to disk utility and erase the disk unit that will receive the OSX and put the name as you prefer and keep the default of system for format, APFS and Scheme, Guid Partition Map and click to erase. After finished, close the disk utility and go to Reinstall Mac OS Monteray.
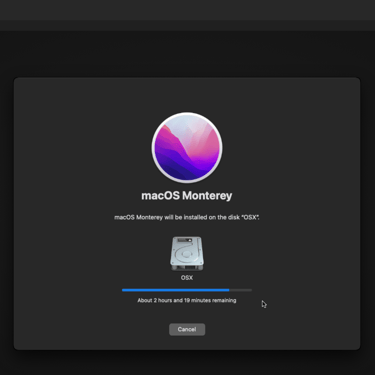
After going to installation and agree with terms of license, our disk unit will be available to be chosen to install the OSX. The previous step to erase the disk is mandatory to installation the OSX, if you not prepare the disk, the unit not be available to install. After the beginning, the system will be prepared. After a few minutes, the OSX will reboot and the boot menu is going to be displayed. Now, the option macOS Installer will choose, the option number 2.
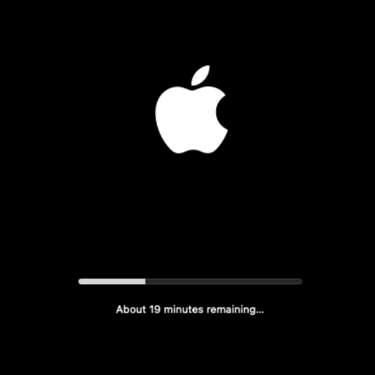
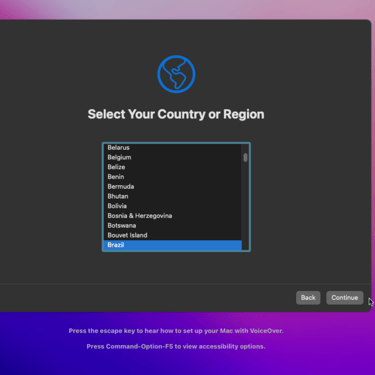
After a some reboots the boot disk option named by your choose, in my case OSX, will appear, and you will put their number, normally the option number 2. And finally the OSX was installed, and the next steps will be the customizations like country, keyboard layout, account and others.
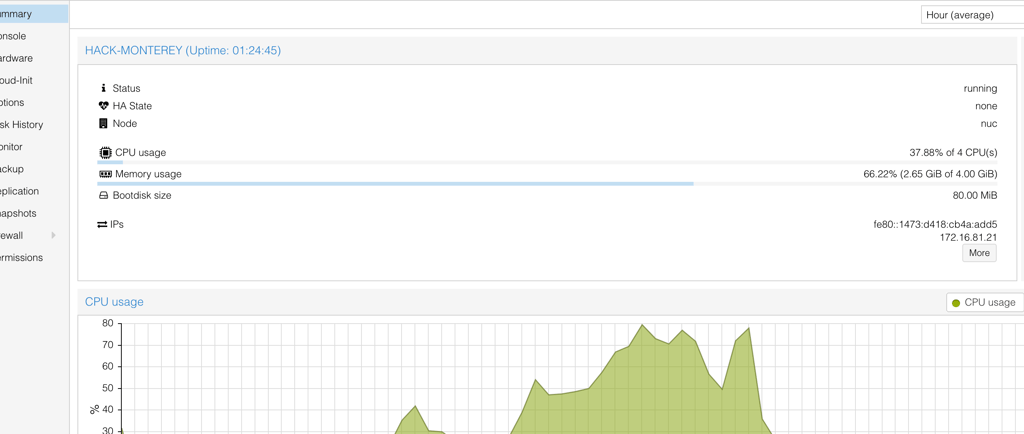
An important point to consider is the performance of OSX VM is the hardware on host. In my homelab the machine CPU is an Intel Core i7 9700T with 8 cores and 64GB of RAM, the storage disk space are two units of 1TB each. It's a modest hardware to nowadays but totally capable to run the OSX for the tests for usability of 3rd party software behavior on Mac OS.